Original image by Unsplash
When you decide to use Sass (Syntactically Awesome Stylesheets) in your project, it’s important to take into account that you can choose between installing specific applications or using the command line. This post explains how to set up Sass with the latter option on Mac.
1- Install Sass
Sass is a library built upon Ruby, so we’ll need to use the Ruby gem utility to install it. If you’re using a Mac this step will be pretty painless, since this usually comes with a Ruby version preinstalled.
Let’s start by opening your Terminal and typing:
$ gem install sass
As this example show, you might run into an error installing this gem — this is because you need administration privileges to do this. Just use sudo, which runs the command as the root user.
$ sudo gem install sassAfter a successful installation you’ll get a message like this:

We can also check it’s alright by typing:
$ sass -v2- Install Compass
Let’s go ahead and add Compass, an open-source CSS framework that provides powerful tools for Sass. Compass allows you to build efficient and maintainable stylesheets in a very user friendly way. Learn more about compass here.
To install it we’ll also use sudo.
$ sudo gem install compass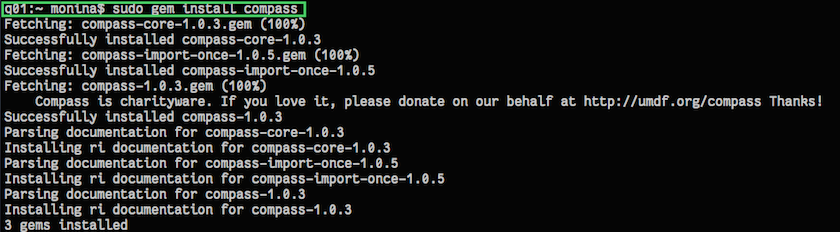
3- Create a new project with Compass
Once Sass and Compass are up and running, it’s time to set up our Sass project. First, let’s locate the directory where you want to create it.
$ cd <directory-path>If you want to use the SCSS syntax in your project, run:
$ compass create <myproject>Or, if you prefer the Sass syntax instead, type:
$ compass create <myproject> - -syntax sassOnce your Compass project has been created, you’ll get a successful message like this one:

4- Configure your project
In the base directory of your project you’ll have:
- config.rb, where you can configure properties. Look here for further details.
- sass, where you’ll put your CSS code.
- stylesheets, where the CSS will be compiled.
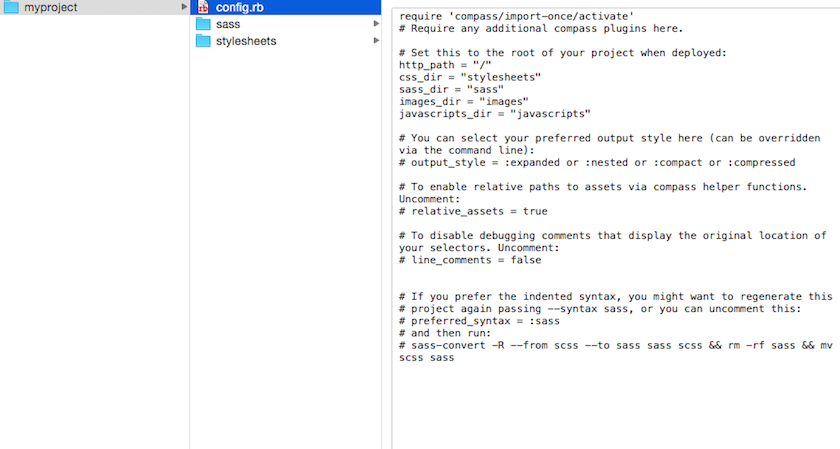
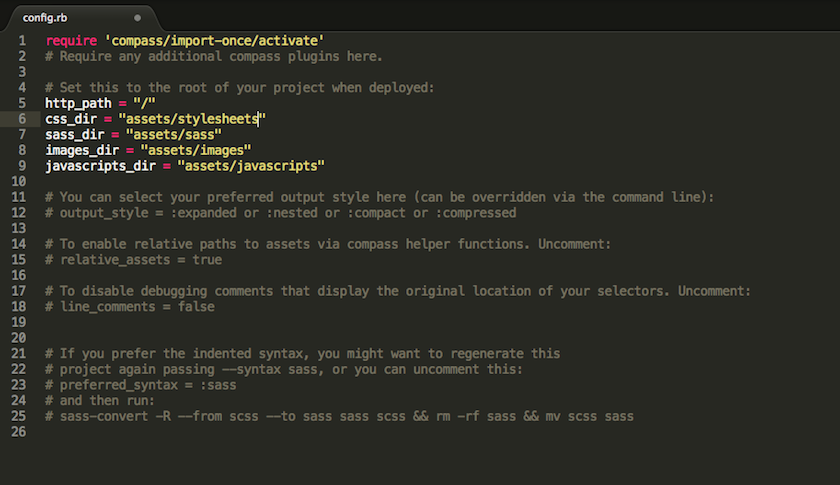
The first thing we need to do is to configure the Ruby file config.rb with an editor like Sublime. Let’s specify where your Sass, CSS, images and javascript files will be placed.
Here’s how I set the properties. The only change I made was adding a folder called “assets” to store the files I mentioned above.
5- Compile your project Sass into CSS with Compass
First make sure you’re in your project folder.
$ cd directory-path/myprojectThere are two ways to compile your Sass stylesheets:
$ compass watch
This will monitor all changes in your project and recompile Sass files automatically. With this option, you’ll always keep your CSS files up to date.
$ compass compileThis means it works on demand, so whenever you run this command your CSS files will be compiled.
Congratulations! You’re ready to make the most of what the Compass framework provides.
If you haven’t had the chance to get your hands dirty with it yet, check the following resources to get started!
Some guides:
-
Best practices - Compass documentation
-
Sass basics - Sass-lang
-
Style guide - Sass-lang
-
Sass documentation - Sass-lang
Tutorials and examples:
-
Code examples - Compass documentation
-
Sass snippets - CSS Tricks
More specific:
-
Compass Reset - Compass documentation
-
Media queries in Sass - CSS Tricks
-
Responsive Web in Sass - The Sass Way
-
Susy grids - Susy